Product Love: Glitter Ritz

One of my favourite products are the Glitter Ritz micro fine glitters. I love how they add sparkle in a subtle way, and how well it stays in place. It’s such a fine glitter – much finer than other “fine” glitters. It really is a micro fine glitter. I use it with Scor-Tape, but I’ve seen others use different brands of tape. The other great thing is that once you put the glitter on the tape you can burnish it – just by rubbing your fingertip over it, and it creates a velvety texture.

Glitter Ritz

Glitter Ritz

Here you can see the jar of glitter on a layout where I used some of it on the tag reinforcement. (You can see the post about that layout here.)

Martha Stewart Fine Glitter (L) next to Glitter Ritz Micro Fine (R)

Martha Stewart Fine Glitter (L) next to Glitter Ritz Micro Fine (R), and a close up of Micro Fine Glitter in the jar

This is a side by side comparison. I wanted to show you just how fine their “micro fine” glitter is. The reinforcer on the left has Martha Stewart’s Fine Glitter in Smoky Quartz. It’s definitely a fine glitter, but it looks absolutely chunky next to a micro fine glitter. The micro fine is more like a powder, and it gives a smooth and even finish.

Just a few of their colours

Just a few of their 150 colours

These are just a few of the 150 colours available. You can see all the colours of Micro Fine glitter that they offer, as well as the Ultra Fine glitters they make, by clicking here. Click on the type of glitter you’re interested in, and a page with colour samples and step-by-step project ideas opens right up.

You can also check out a stunning card Jennifer McGuire made with Glitter Ritz, and she made a video showing all her wonderful tips and tricks. Love her for that!

New for me: Peerless Watercolours

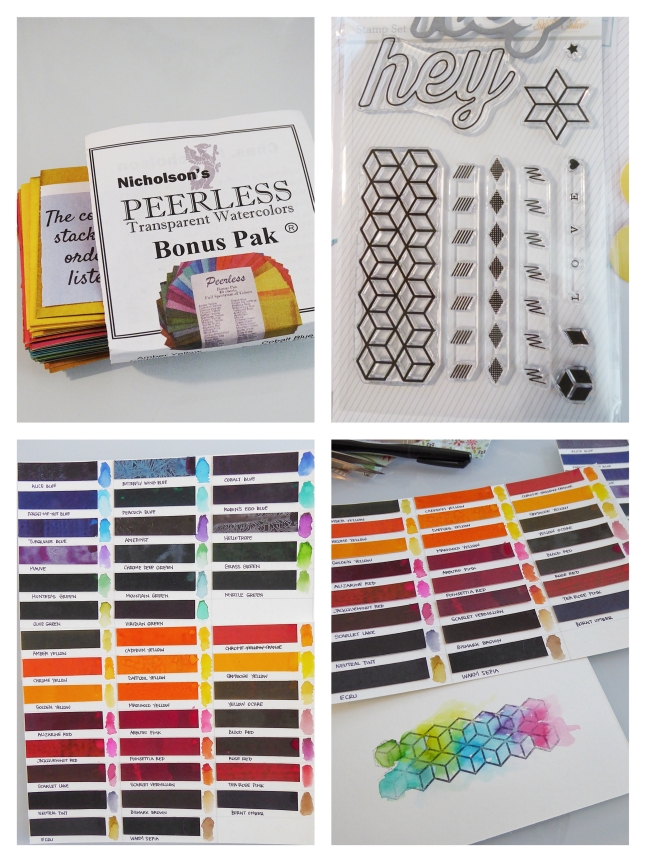
This Christmas was wonderful and I got a lot of new goodies. I’ve been slowly trying out each one, and the one that has me the most excited is the Peerless Bonus Pack. Forty beautiful and brilliant colours.

I have many different watercolour paints – liquids, pans, expensive artist quality, and inexpensive craft quality, and they’re all fun to use. The colours included in the Peerless Bonus Pack can’t be beat. They have an intensity and vibrancy to them that I haven’t seen with any of my other paints. The colours are modern, if that makes sense. These are not the soft, muted colours that might come to mind when you think of watercolours that were created over 100 years ago.

Peerless Watercolors

Peerless Watercolours

I ordered the set from Studio Calico (you can find it here), which is also where I got the Cube stamp set in the pictures (that’s here). I created my palette by cutting strips of Peerless watercolour and adhering it to a 6×8 sheet of watercolour paper, writing the colour name underneath the paint, and painting a small swatch to the right of the paint. I was able to fit all forty onto two pieces of 6×8 paper, and keep them tucked into a 6×8 page protector.

You can use a brush and cup of water, or use a water brush with these paints. The look is slightly different depending on which you choose, although there are ways to make brush and water strokes look like they were done with a water brush or vice versa. In general, for even colour a brush and a cup of water give the easiest results. If you’re looking for more variation – from concentrated to dilute, you can more easily accomplish that with a water brush. I’m working on a layout now using these watercolours, and I’ll show more about the differences in that post.

Relaxing and painting

I had to include a picture of the cat because she loves when I paint. She has absolutely no interest – ever, about water in a bowl. But as soon as I start cleaning my brushes in one, she wants to investigate and drink from it. She will sit nearby and wait patiently for any chance to sneak her nose into a cup of dirty paint water.

Product Review: Tim Holtz Distress Marker Spritzer


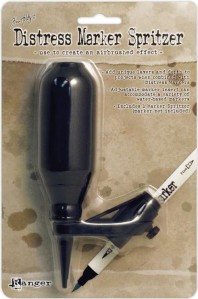
I had walked past this tool for months before I bought it. It always caught my eye, but I wasn’t convinced it would give me the look I wanted – a fine, delicate, even mist, from the markers I already had. I didn’t want to have to buy more markers – I have a bunch of Copics and I wanted something that would work with them. I finally Googled the tool, found this video of Tim Holtz showing how it could be used with any marker, and that was enough for me to give it a try.

When I got it home, I knew after the first spritz that it was perfect. It worked just how I wanted with my Copics, but also with any other marker I tried. It is easy to switch out markers – very quick, and no clean up required. You can control how intense the colour goes on by how close you hold the tool to the paper. Much like with mists, the closer you hold the tool to the paper, the more dense the ink goes on and the more you can see the direction of the spray. Hold the tool a bit farther from the paper and you have an even, fine application of ink without loosing any intensity of colour.

Tim Holtz Spritzer

Tim Holtz Spritzer

tlun 2014-09 producttimholtzspritzer 04You can overlay colours to create a very natural blend or gradation from one to the other – it is very easy to get soft blends from one colour to another. You don’t have to wait to add more colour the same way you do with mists. It is such a light spray of ink that goes on that the paper doesn’t warp, dries very quickly, and doesn’t bleed through. The paper I tried it on is a notebook weight grid paper by Studio Calico, and you can see that there is absolutely no warping or rippling, and there was no bleed through on the back of the paper.

I love being able to use my Copics in another way, and that I can mist things in any colour I want. It doesn’t take up much room and doesn’t need any sort of refills. It is inexpensive ($15USD at both Scrapbook.com and A Cherry On Top), and well made. If you like misting or want a new way to create backgrounds for stamped images, this is a great tool to have around.

If you’re interested in what the first layout I did using the Spritzer looks like, be sure to check back on Thursday for that post.

Sharpie Pens

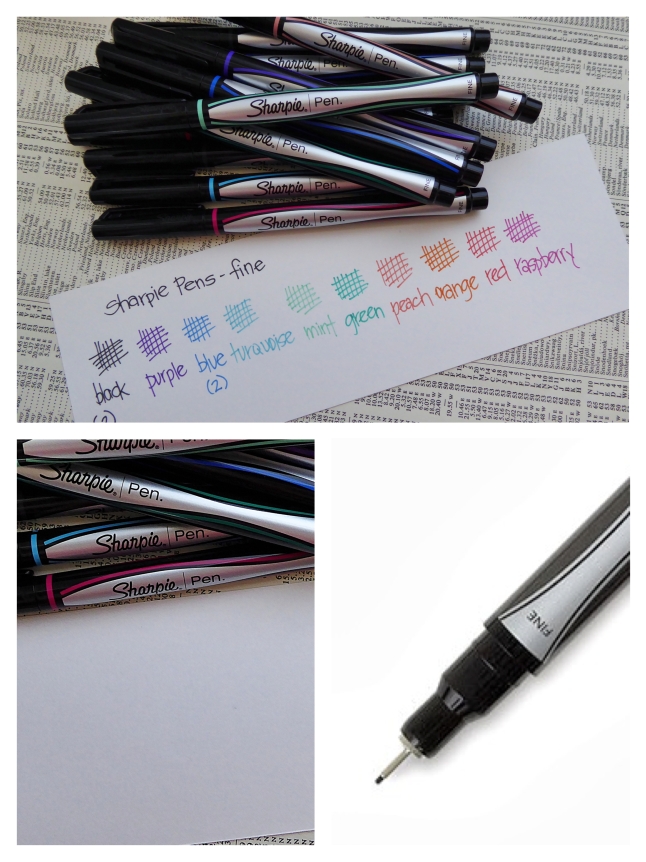
I’ve been using Sharpie Pens for a while now. I love how easy they are to find (meaning I can usually find them on sale somewhere), how long they last, and how well they write on photos and glossy surfaces. They call them “pens” but I would call them a marker – there’s no rollerball which in my mind is what makes a pen a pen. These have a nub? Felt bit? Not sure what it’s called but I’m sure you know what I mean :) Anyways, I found a set of twelve that has ten different colours ( you get two each of the black and the blue). I found them at Target for $12CAD, but you can easily find them at office supply stores.

Sharpie Pens

Sharpie Pens

They’re great for writing on photos, or those journalling cards that have a bit of a slick surface – I’m looking at you Crate Paper The Open Road. They dry quickly, and don’t have an odour. They also don’t bleed through so they’re great to use on cut apart type journalling cards if you’re planning on the reverse side showing on the other side of your pocket page. I used Recollections white card stock, and that bottom left photo is the back side – you can’t see where any of the writing is. They write smoothly, and the nib (again?), doesn’t fuzz up so your line stays crisp even after a lot of use.

For me, the black is a basic that I always have around. Finding them in colours was a happy find – sometimes black is just too dark, too high a contrast on a lighter page. I also think that having the additional colours will be useful for adding a simple lined border around elements. The price and quality means these are a great value – something I always love.


N.B. I have no connections to Sharpie or any retailer, and I bought these of my own free will :)


Liquitex Professional Paint Markers

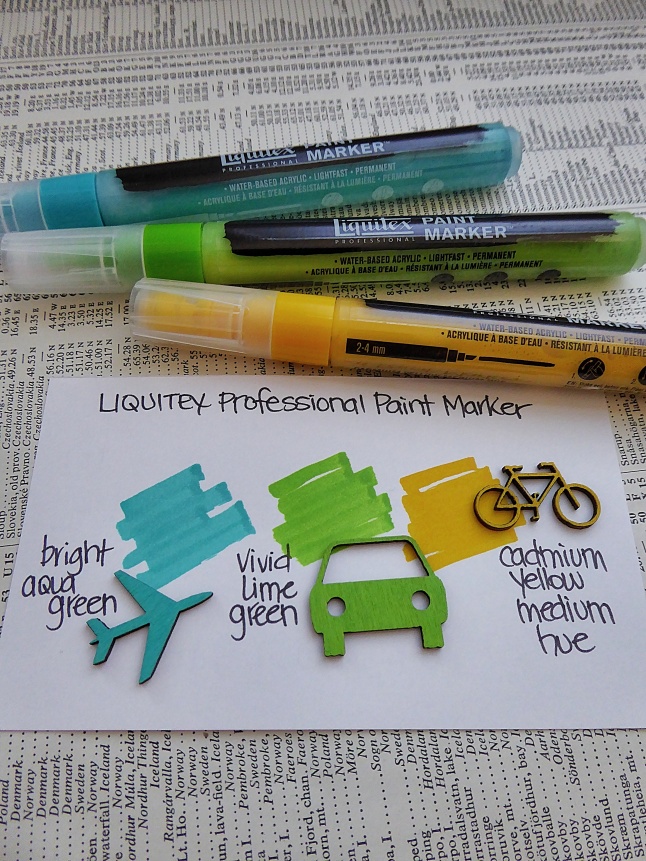
I had to jump on today and show you my newest product find – I love them that much! They’re Liquitex Professional Paint Markers. I found them at Michaels, in the art supplies section, but a quick peek online shows that they can be found at most art stores – DeSerres, Dick Blick, Curry’s, and the like. Their colours are amazing, and the paint is so incredibly pigmented. That’s one coat on those Studio Calico wood veneers and just look at them!

Liquitex Paint Markers

Liquitex Paint Markers

On paper, that’s plain old Recollections white card stock in the pictures, they leave a highlighter type mark at the end of the stroke. It’s more visible with the aqua and green than with the yellow. They’re not too wet – the paper didn’t warp, but the tip isn’t soft so I would expect that with multiple coats on paper you could end up roughing up the paper. On the wood veneers, the colour is super saturated but the texture of the grain is still visible. I’m not sure if with multiple coats the paint would start to sit on the surface more, but I’m so happy with the boldness of the colour that I didn’t feel the need to add additional coats. It dries quickly, about 2-3 minutes, on both the paper and veneers.

So, the details: the paint is a water-based acrylic, it’s lightfast, opaque, and it’s permanent. The markers shown have the smaller chisel tip, 2-4mm, but a broader tip is also available. They sell for about $8 CAD at Michaels, but I couldn’t find what the MSRP is – I find Michaels hit and miss on pricing for art supplies. Sometimes they work out to be the better deal, especially if there’s a coupon, and sometimes the art store has stuff a bit cheaper.

For me, I love how pigmented they are, the colours they come in, and how easy the pen is to store and use. Price wise, they’re not too different than other scrapbook products like Tim Holtz inks and paints or Heidi Swapp Color Shine mists. I’ll buy them with I have a definite project in mind, but unless I find them on a huge discount I won’t be stocking up. What I’m excited about is trying them out on chipboard. They have some stunning reds that would be just perfect for use on a December Daily. I’ll let you know how that works out :)

N.B. I have no connections to Liquitex or any retailers, and I bought these products of my own free will :)